NewSprout Support Articles
How to setup Email on your iPhone/iPad
We have broken the guide down over the last 3 iterations of iOS to make it easier for you, as there are some subtle changes with each iOS update.
Some Basic Settings explained
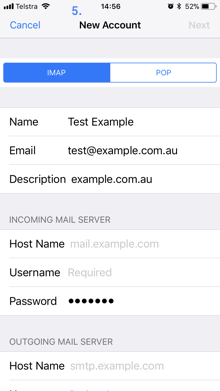
Account Type: POP or IMAP
IMAP is the default setting, this won’t “Save” all emails to your iPhone, (unless you drag them to a different folder on your phone) you will only see what is currently on the mail server.
If you have your computer email client set to POP, this is usually the last 14 or 30 days worth of emails, depending on how you setup the POP account on your computer email client.
POP will grab its own copy from the server and keep it on your phone until you delete it. A good option if you use your phone or tablet more than / instead of a computer for your emails.
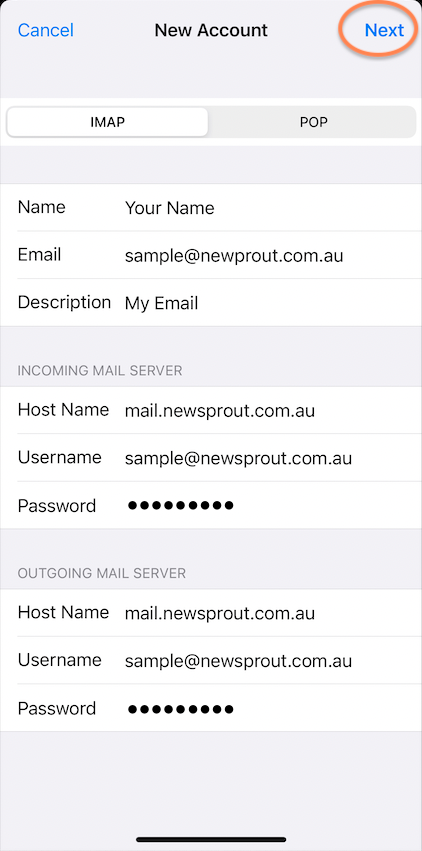
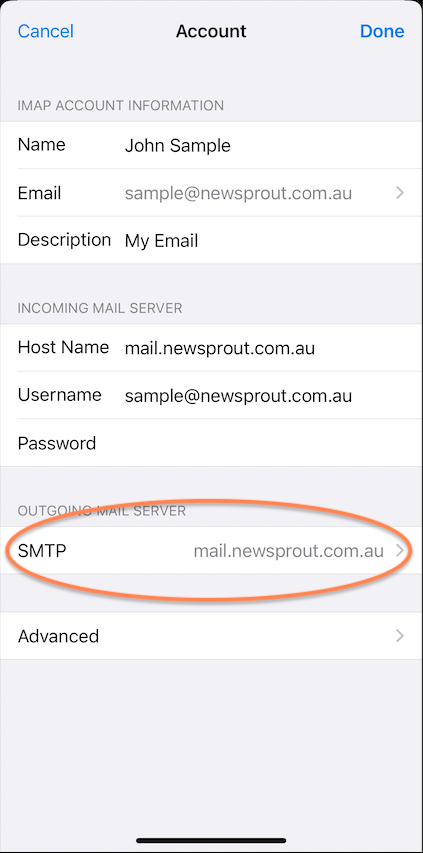
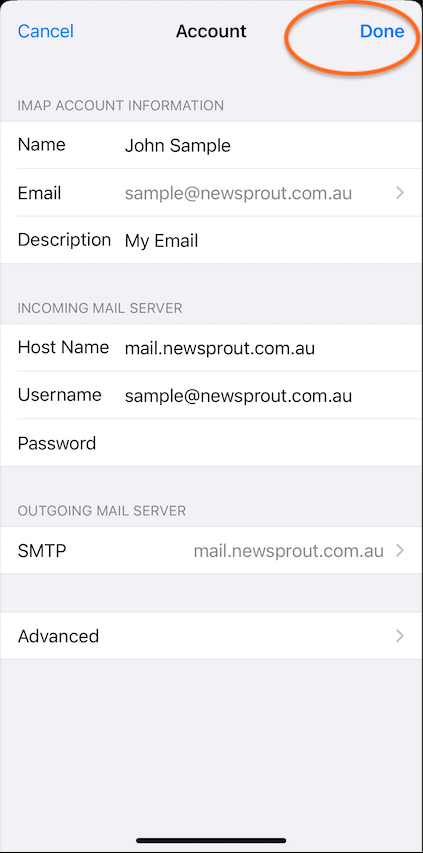
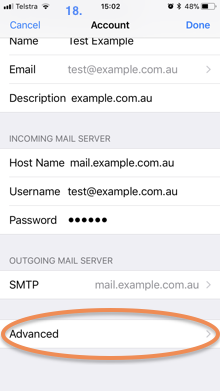
Email Address: the email address you are setting up (the one you have just created in your cPanel )
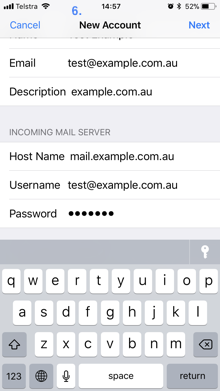
Username: same as the “Email Address” (Please Note: it is the FULL address and not just the first part)
Password: the one corresponding to this email address (the one you have just created in your cPanel )
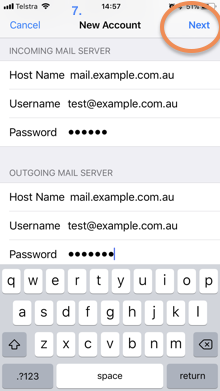
Incoming Server: mail.yourdomain.com.au (please replace “yourdomain” with your actual domain name, i.e. the last part of your email address)
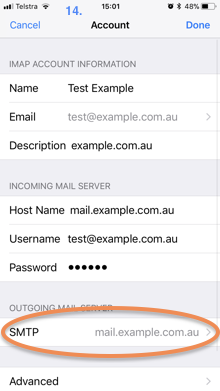
Outgoing Server: mail.yourdomain.com.au (please replace “yourdomain” with your actual domain name, i.e. the last part of your email address)
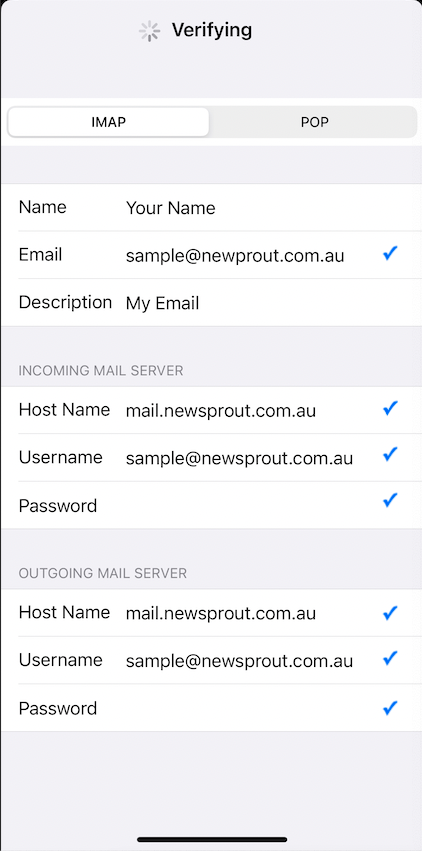
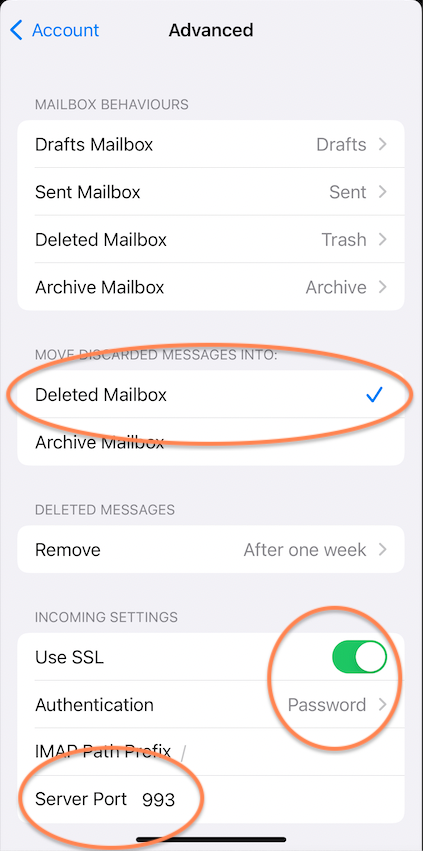
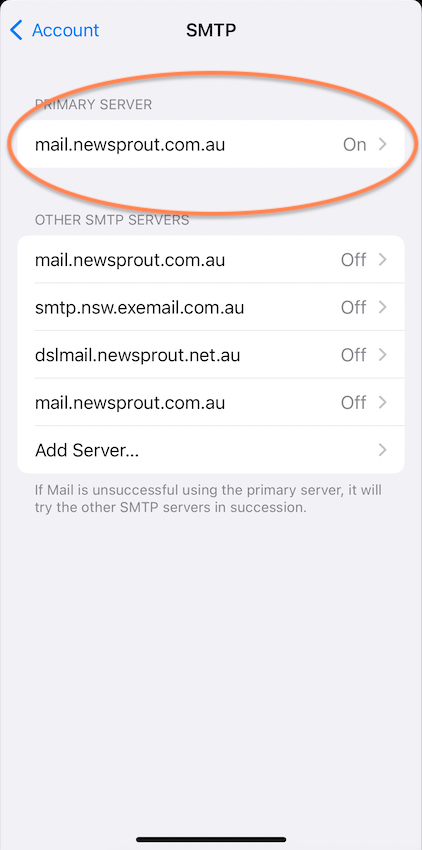
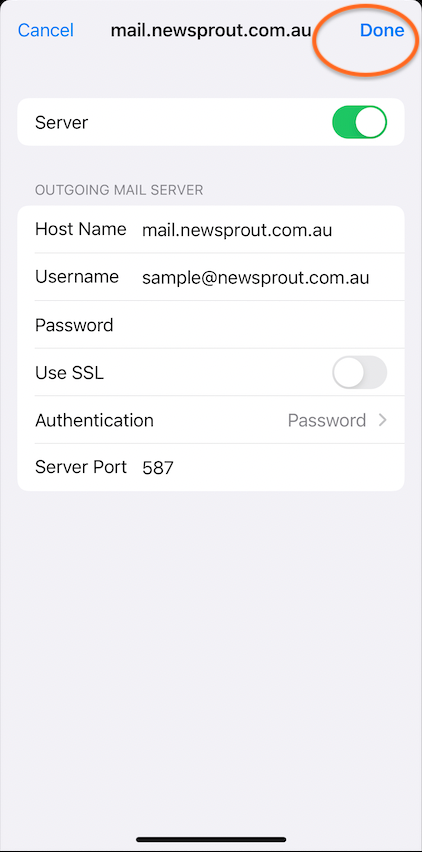
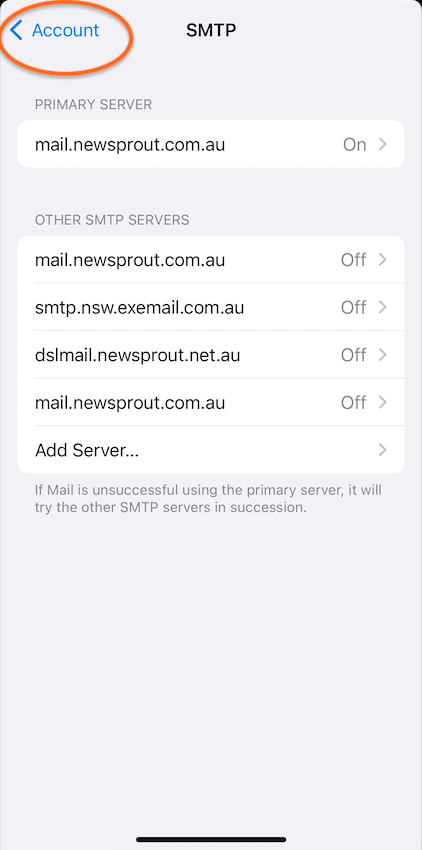
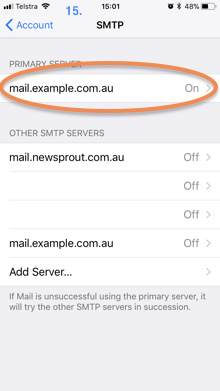
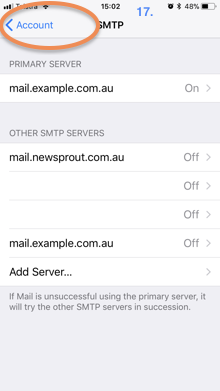
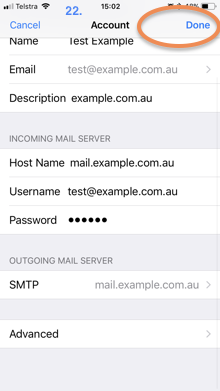
For the Outgoing SMTP Server there are 3 extra steps and you need to go back into the account settings to change these once your email account is setup. This is shown in the screenshots below.
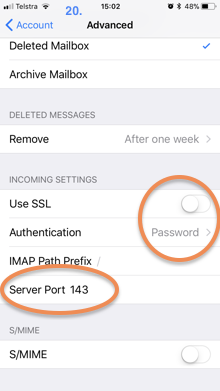
1. Enable Password Authentication
2. Change the SMTP Port from “25” to “250”
3. Untick the “Use SSL” options.
========
iOS 14, 15, 16, 17 Setup Instructions
iOS 12, 13 Setup Instructions
========
iOS 14, 15, 16, 17 Walkthrough
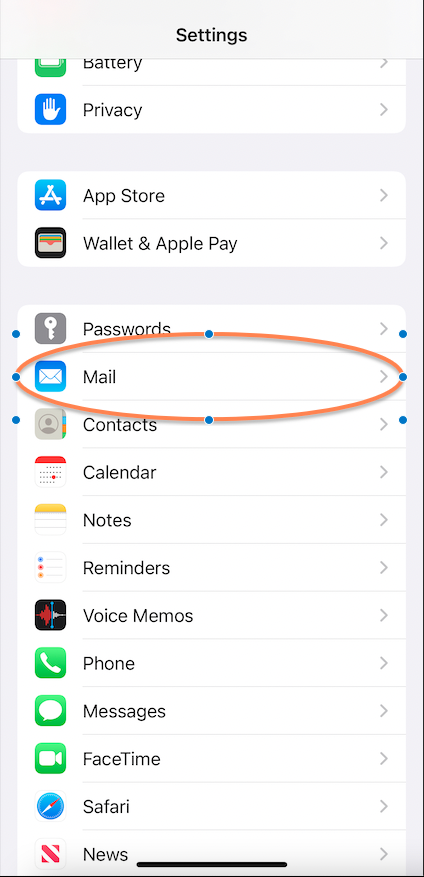
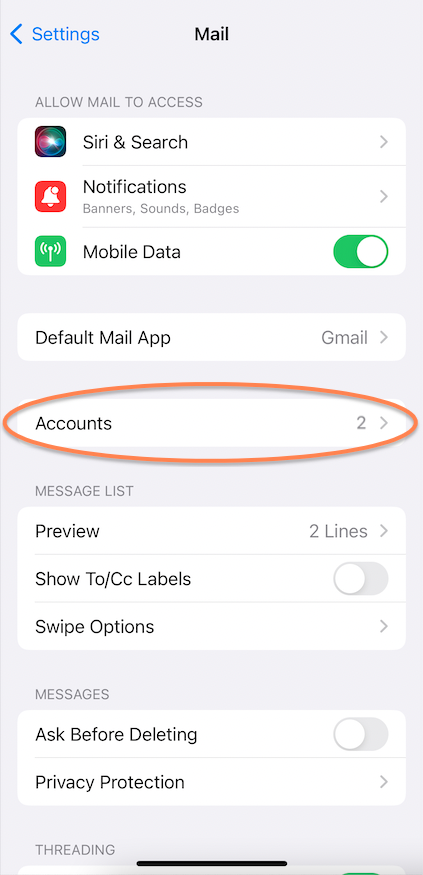
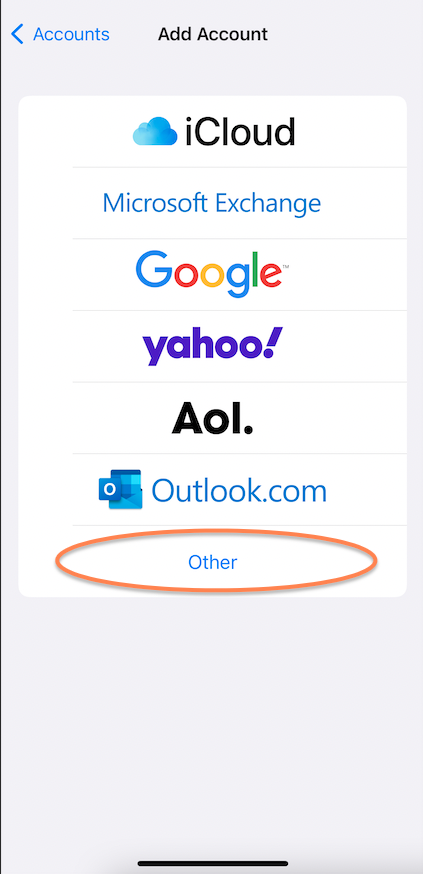
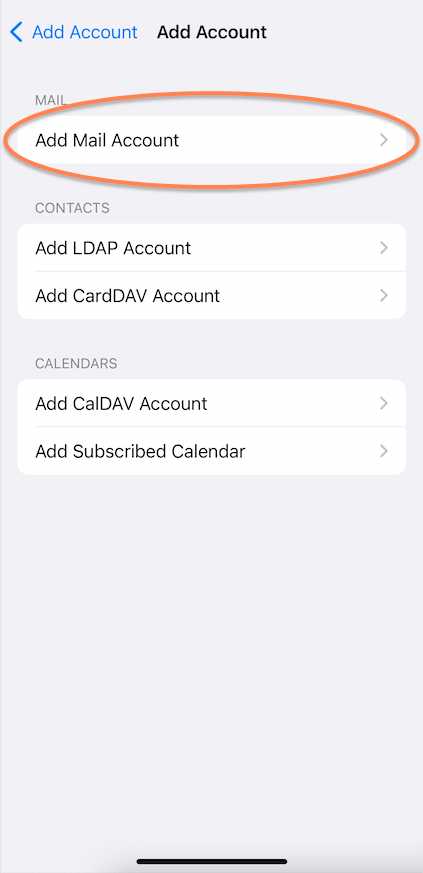
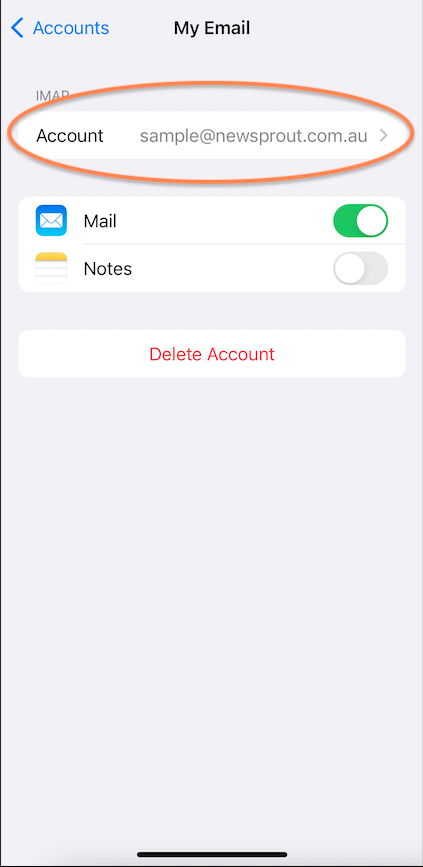
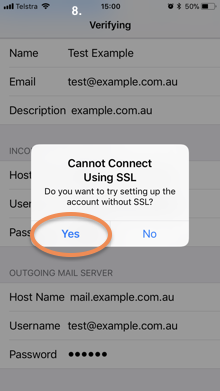
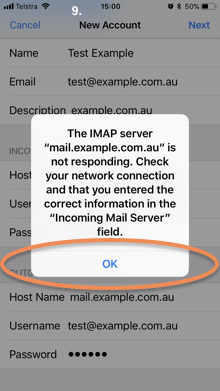
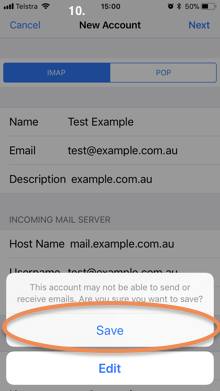
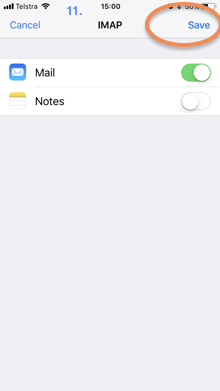
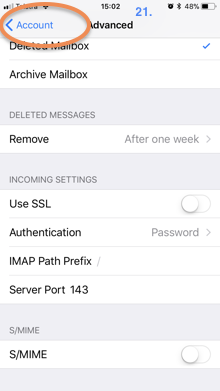
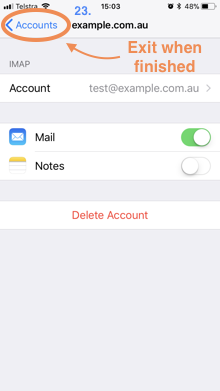
Go to Settings App, scroll down to “Mail” and follow these 24 steps, please replace the “example.com” domain name with your real domain name:
(please also see notes at the end)


A few little things to note:
- Outgoing Server: this should be the same as your Incoming Server with Port changed to: 250
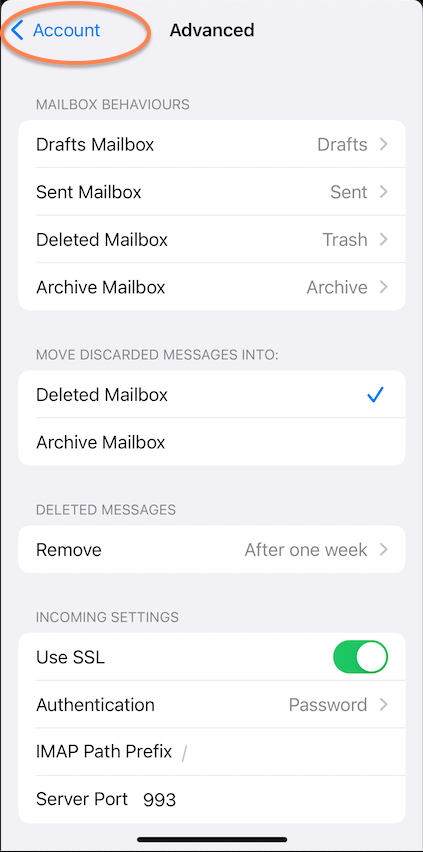
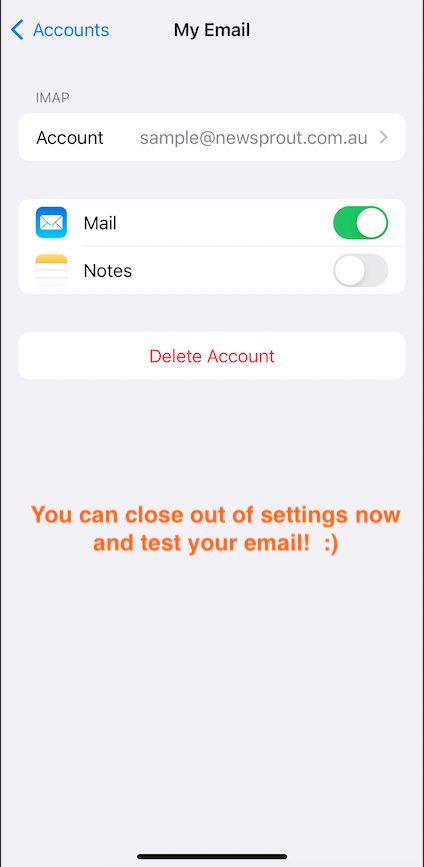
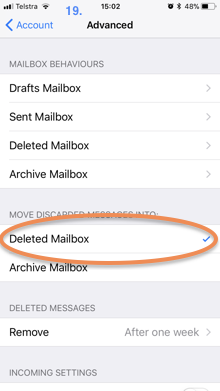
- Ticking the “Deleted Mailbox” shown above rather than the “other” one will allow you to delete emails only on your iPhone.
- Some of the screens take a while to complete. Please ensure you wait for them to complete properly and follow all steps above.
==============================
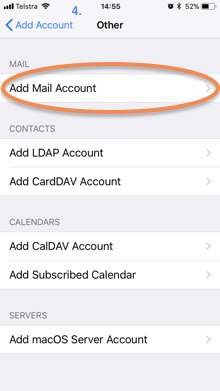
iOS 12, 13 Walkthrough
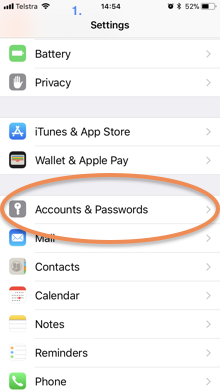
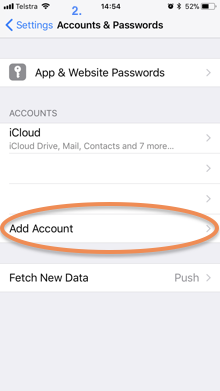
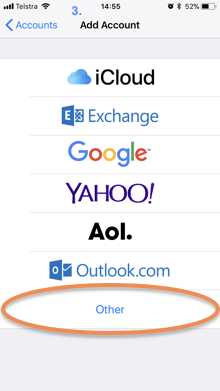
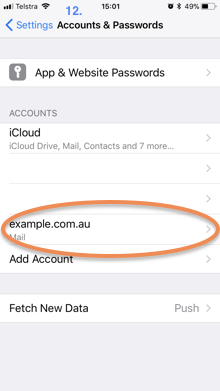
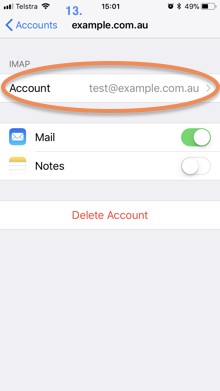
Go to Settings App, scroll down to “Accounts & Passwords” and follow these 23 steps, please replace the “example.com” domain name with your real domain name:
(please also see notes at the end)

A few little things to note:
- Outgoing Server: this should be the same as your Incoming Server with Port changed to: 250
- Ticking the “Deleted Mailbox” shown above rather than the “other” one will allow you to delete emails on your iPhone.
- Some of the screens take a while to complete. Please ensure you wait for them to complete properly and follow all steps above.
24/7 Email Support
Support@NewSprout.com.au
Response time: less than 58 minutes
Call 02 6687 6533
Speak to our Australian Support team
8:30am - 5:30pm AEDT